I have categorized them into three simple steps,
| Pre-requisites | Setting up XM Cloud Build Configuration | Commonly used Commands while developing with XM Cloud |
1. Pre-requites to work with Sitecore XM Cloud using Sitecore CLI
Sitecore XM Cloud plugin needs to be configured in order to work with XM Cloud tasks. To configure it, you would need below list of pre-requisites.
- .NET 6.0
- Sitecore CLI version 5.0 or later
- XM Cloud plugin installed
Note : Check your sitecore.json file to see if Sitecore.Devex.*.* versions are >5.0 and XMCloud plugin is installed.
{
  "$schema": "./.sitecore/schemas/RootConfigurationFile.schema.json",
  "modules": [
    "src/*/*/*.module.json",
    "src/*/*/*/*.module.json"
  ],
  "plugins": [
    "Sitecore.DevEx.Extensibility.Serialization@5.0.16",
    "Sitecore.DevEx.Extensibility.Publishing@5.0.16",
    "Sitecore.DevEx.Extensibility.Indexing@5.0.16",
    "Sitecore.DevEx.Extensibility.ResourcePackage@5.0.16",
    "Sitecore.DevEx.Extensibility.XMCloud@1.0.19"
  ],
  "serialization": {
    "defaultMaxRelativeItemPathLength": 100,
    "defaultModuleRelativeSerializationPath": "items",
    "removeOrphansForRoles": true,
    "continueOnItemFailure": false,
    "excludedFields": []
  }
}
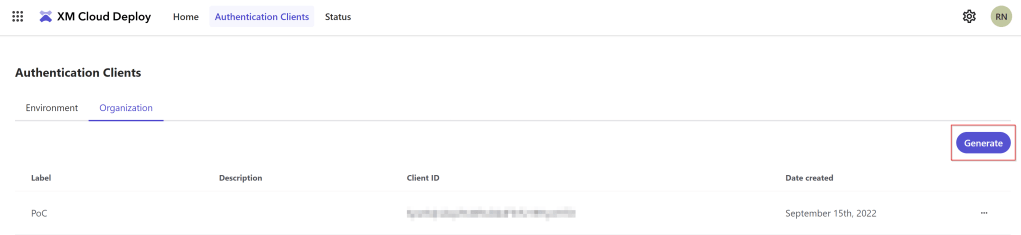
Once you have these pre-requisites, you would then need to create an user in XM Cloud portal to login through browser or you can also create an authentication client for browser less authentication.
2. Setting up XM Cloud Build Configuration
The next step is to setup the XM Cloud Build configuration in order to deploy your solution in Sitecore XM Cloud. It is a json configuration with few properties that is used by Sitecore XM Cloud CLI to perform certain tasks.
{
  "deployItems": {
    "modules": []
  },
  "buildTargets": [],
  "renderingHosts": {
    "<key>": <value>
  },
  "transforms": [],
  "postActions": {
    "actions": {
      "<key>": <value>
    }
  }
}
Let’s see what these properties are, and how they are used by XM Cloud.
- deployItems : It is used to configure the Sitecore Serialization modules that you would want to deploy in XM Cloud instance.
- buildTargets : Used to define the projects and solution that needs to be built. It is passed through as a msbuild command
msbuild .\src\platform\Platform.csproj /p:Configuration=$env:BUILD_CONFIGURATION /m /p:DeployOnBuild=true /p:PublishProfile=Local
- renderingHosts : It is used to set the location for Rendering hosts, currently it is a key value pair type of configuration – note : key should be an unique site name.
- transforms : You can provide an array of XDT paths that needs to be transformed to configs. It accepts wildcards to the location. For more information, follow the documentation.
- postAction : These are set of operations that needs to be performed after the deployment of XM cloud instance. Post actions that are currently supported are these :
- CM warm-up.
- Schema population.
- Reindexing.
- Publishing.
Post actions are documented pretty well, I would recommend having a look on how to configure it.
A sample xmcloud.build.json from XM cloud introduction repository.
{
    "deployItems": {
        "modules": [
            "Foundation.*",
            "Feature.*",
            "project.*"
        ]
    },
    "buildTargets": [
        "./src/Environment/platform/Mvp.Environment.Platform.csproj",
        "./src/Project/MvpSite/platform/Mvp.Project.MvpSite.Platform.csproj",
        "./src/Project/Sugcon/platform/Project.Sugcon.Platform.csproj"
    ],
    "renderingHosts": {
        "sugconanz": {
            "path": "./src/Project/Sugcon/SugconAnzSxa",
            "nodeVersion": "16.15.1",
            "jssDeploymentSecret":"110F1C44A496B45478640DD36F80C18C9",
            "enabled": true,
            "type": "sxa"
        },
        "sugconeu": {
            "path": "./src/Project/Sugcon/SugconEuSxa",
            "nodeVersion": "16.15.1",
            "jssDeploymentSecret":"110F1C44A496B45478640DD36F80C18C9",
            "enabled": true,
            "type": "sxa"
        }
    }
}
3. List of common CLI commands while developing with XM Cloud
Now let’s look at some common CLI commands that is commonly used while developing with Sitecore XM Cloud.
Authentication :
There are couple of ways to login and authenticate with XM Cloud,
User interface login <Browser> :
dotnet sitecore cloud login
Using Authentication client’s client id / secret :
dotnet sitecore cloud login --client-credentials --client-id <clientid> --client-secret <clientsecret>
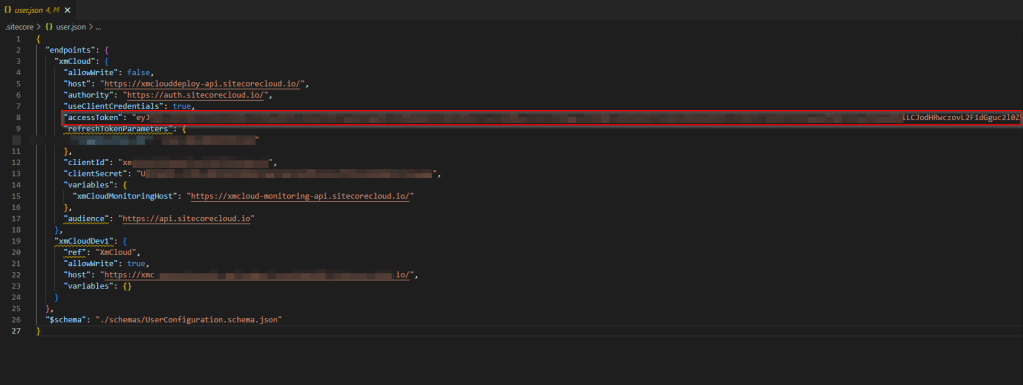
Once authenticated, you will notice AccessToken value set in user.json filled under .sitecore folder. Sitecore CLI then uses this access token to perform XM cloud tasks. You will also notice a list of XM Cloud environments that refers to the xmCloud token.
Create / List Projects or Environments :
To create and list out projects or environments in Sitecore XM Cloud
dotnet sitecore cloud project create -n <projectname>
dotnet sitecore cloud project list
dotnet sitecore cloud environment create -n <envname> --project-id <project-id>
dotnet sitecore cloud environment list --project-id <project-id>
Deployment :
The below command will upload files to a specific environment and start a deployment.
dotnet sitecore cloud deployment create --environment-id <environment-id> --upload
You can also use --working-dir param to upload files within specific folder. Param --no-watch can be set to True or False which will show Deployment status using real-time messages in the CLI and --no-start is can be set to True or False to indicate if Deployment should execute immediately .
dotnet sitecore cloud deployment create --environment-id <id> --no-start --no-watch --upload --working-dir <path>
Serialization :
To sync items using Sitecore CLI , you can use serialization command but make sure you are connected to the environment.
dotnet sitecore cloud environment connect -id <environmentId> --allow-write
## Pull items from XM Cloud instance to your solution
dotnet sitecore serialization pull -n <environmentName>
## Pusing serialized items to xm cloud instance
dotnet sitecore serialization push -n <environmentName>
Publishing :
Before publishing, you would need to execute below command in order to connect with the environment.
And then you can specify a publishing target (–pt), in our example below it is ‘Edge’
dotnet sitecore publish --pt Edge -n <environmentName>
Commonly used CLI commands – CHEAT SHEET
| dotnet sitecore cloud deployment create –environment-id <environment-id> –upload | Creating deployment from locally checked-out branch Note : Make sure the environment is not linked to a branch otherwise this command will not work. |
| dotnet sitecore cloud deployment create –environment-id <id> –no-start –no-watch –upload –working-dir <path> | Uploading files from different work directory |
dotnet sitecore cloud deployment log -id <environment-id> -o <outputpath> | Downloading deployment log for a specific environment |
| dotnet sitecore cloud environment connect -id <environmentId> –allow-write | Connecting to an Environments, used before Serialization command |
| dotnet sitecore cloud environment create -n <envname> –project-id <project-id> | Creating a new environment for a project |
| dotnet sitecore cloud environment list –project-id <project-id> | Listing environments for project |
| dotnet sitecore cloud environment log download -id <environment-id> –log <log-file-name> -o <outputpath> | Downloading a log file |
| dotnet sitecore cloud environment log list -id <environment-id> –latest | Listing out latest logs for environment |
| dotnet sitecore cloud login | Browser based XM Cloud authentication |
| dotnet sitecore cloud login –client-credentials –client-id <clientid> –client-secret <clientsecret> | Using Authentication client |
| dotnet sitecore cloud project create -n <projectname> | Creating a new project |
| dotnet sitecore cloud project list | Listing existing projects |
| dotnet sitecore publish –pt Edge -n <environmentName> | Publish contents to Experience Edge |
| dotnet sitecore serialization pull -n <environmentName> dotnet sitecore serialization push -n <environmentName> | Pull / Push items from XM Cloud environments |
I hope this article should help you to quickly start developing with XM Cloud CLI, let's see below couple of tasks/commands that can help us further with the development in the future 🙂
Feature 1 : CLI Task to watch live logs :
Live XM logs can help developers to monitor the XM instance in a better way and can help them check for issues quickly. It can also be part of deployment task or separate command altogether like below.,
dotnet sitecore cloud environment logs -id <environmentId> --watch
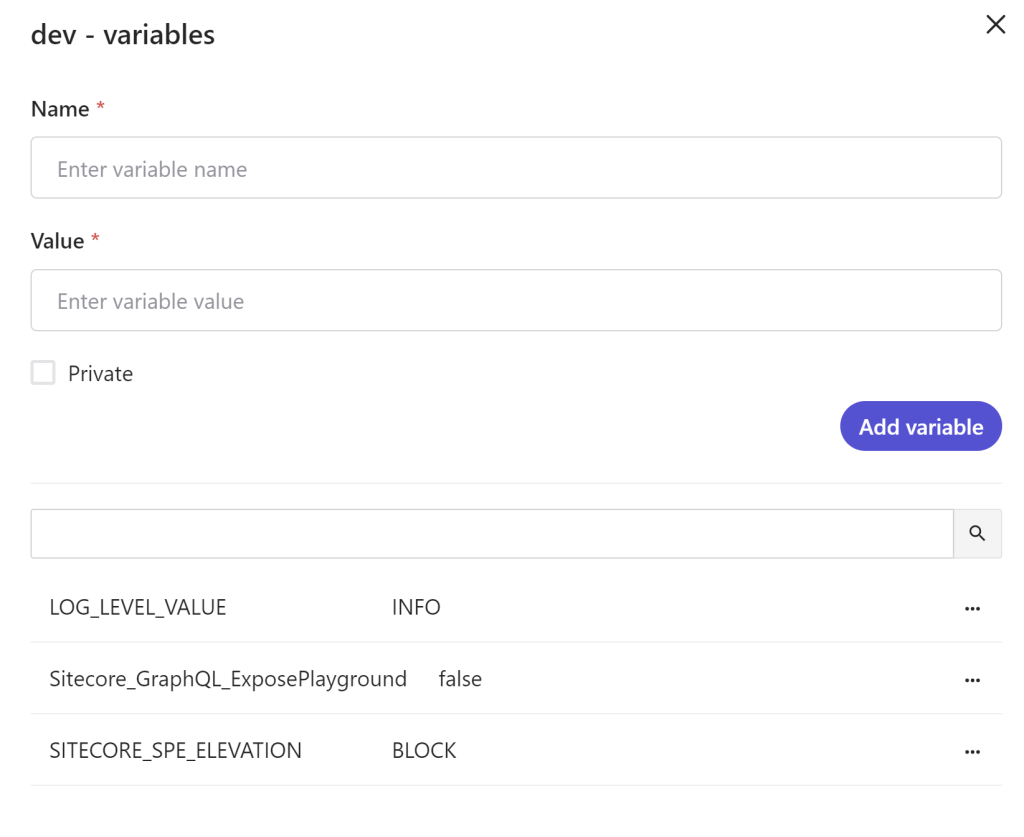
Feature 2 : Managing Environment variables :
I was looking for a command that would let me apply environment variables but I could find it (it might exists or may be part of future release). I would love to have such a feature that way we can easily configure and manage them using CLI.
References
- https://doc.sitecore.com/xmc/en/developers/xm-cloud/getting-started-with-xm-cloud.html : Sitecore XM Cloud official documentation
- https://github.com/Sitecore/XM-Cloud-Introduction : Sitecore XM Cloud introduction repository

2 comments on “Getting Started with Sitecore XM Cloud CLI”