

In this article, we shall see all the steps that we need to take to configure and run couple of apps from XM-Cloud-Introduction repository created by our amazing devs from Sitecore to demonstrate Sitecore XM Cloud development. There are three Sitecore headless apps in this repository – Sitecore MVP Site ( which is built with .Net Core) & SUGCON EU & ANZ app ( built with NextJS). For simplicity of this blog, we shall make SUGCON apps to run on Gitpod.
What is Gitpod ?
Gitpod is an open-source developer platform, which let’s you to spin up a development environment directly from the repository within seconds. To develop / review or fix a bug – you would just need to create a new workspace which internally spin up a docker instance running on Linux with VS Code. To make it feel like your local, you can install all your favorite extensions, set your themes and terminal.
How can we use it for Sitecore Development ?
There are lot of ways to work with Sitecore, running Sitecore on Docker locally is preferred option for many of us but with the release of Sitecore XM cloud & Sitecore Experience edge, you don’t have to run Sitecore locally anymore on your machine. You can use ‘Edge’ mode development – i.e, connect with Sitecore Experience Edge using GraphQL Endpoint and Api-Key to develop headless application.
You can also have a project specific docker image created for your Gitpod that has all the prerequisites configured in it, making it easier for the team as they’ll have same set of configurations and you will not get issues that are related to local machines ( all those weird docker issues in each of our machines.. 😉 😉 ).
This opens up completely new developer experience as you do not have worry about having a powerful machine to run Docker locally, you could instead use Gitpod to spin up your workspace and work directly in browser. You could also work on different projects at the same time and don't have to worry about switching to different Docker environments. In fact, you don't even have to install any set of prerequisites in your machine - you can freely choose between Windows / Mac or Linux machines.
Hope I have given enough intro, now let’s jump into steps to run Sitecore apps on Gitpod.
1. Setup Gitpod workspace
It’s simple to setup a workspace in Gitpod, you would just need to authenticate with your Github account to provide access to Gitpod. Once you authorize Gitpod to access Github, you can go to workspace and choose your repository.

2. Add Environment Variables for your repository
Time to configure the secrets within Variables setting in Gitpod. Click on your profile and navigate to settings,

Click on variables and add all the four variables ( Graph_QL_Endpoint / JSS_Editing_SECRET / SITECORE_API_HOST & SITECORE_API_KEY) that are required for ‘Edge’ development.
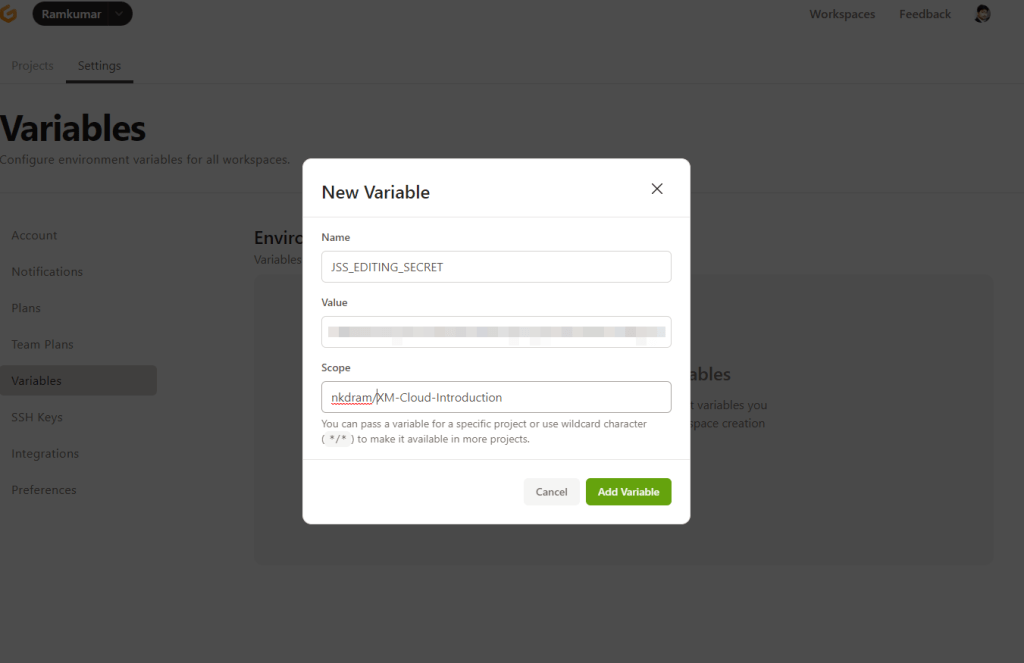

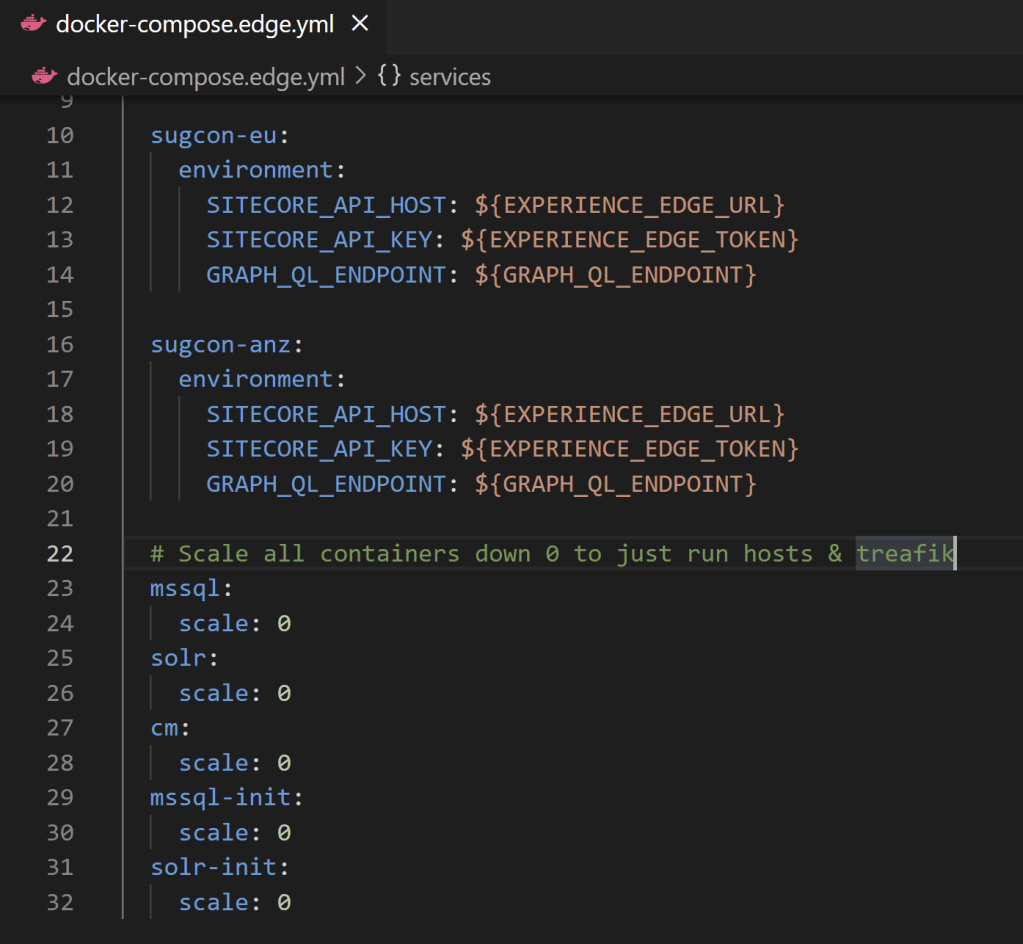
So how did I come up with these four variables ? It’s from the docker-compose.edge.yml which is created to run the NextJS apps in Edge mode locally, uses these variables together with JSS_EDITING_SECRET.
You can run below command to view all the environment variables configured. You’ll notice a whole bunch of variables together with the variables we have created above.
env | grep GITPOD_
3. Running the app through Gitpod Workspace
Now that we have configured environment variables it’s time to open the workspace and run the app. Once the workspace is opened, you will feel it exactly like your Visual Studio Code running on a local instance.
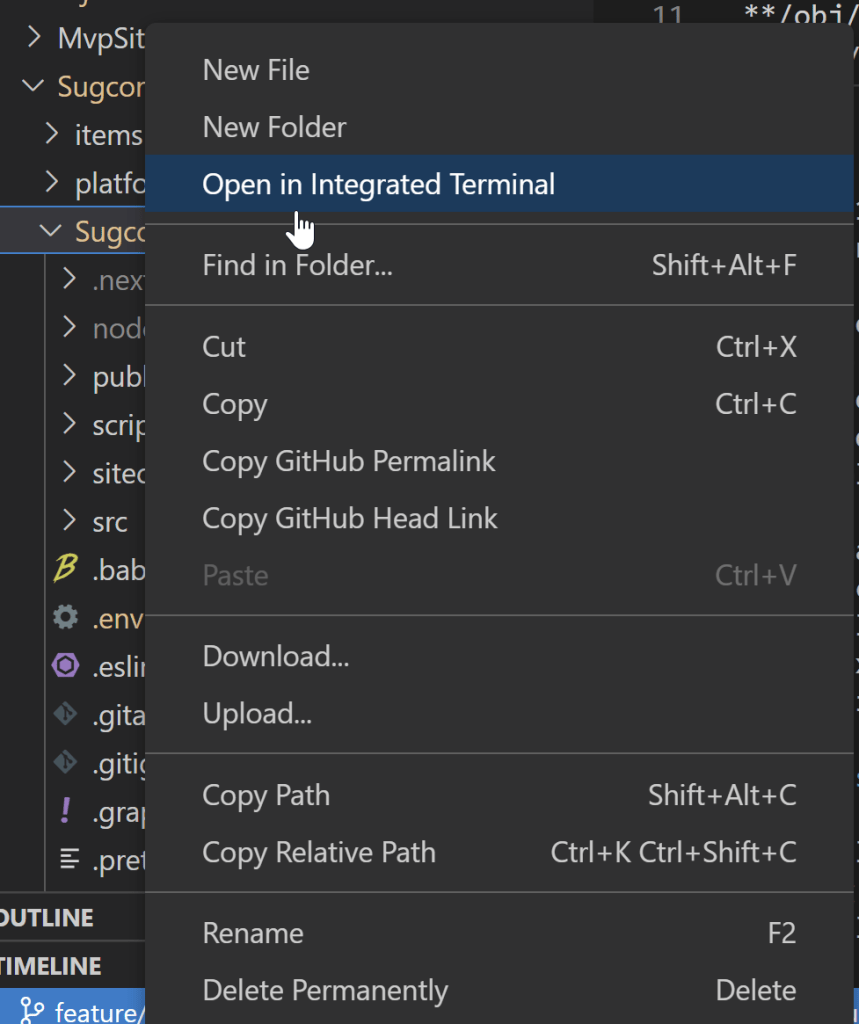
Let’s navigate to SUGCON Anz project and open terminal window by right clicking the folder.
npm install
npm run start:connected
Run above commands to install npm packages and to start the NextJS app in connected mode. You’ll notice that the app starts in 3000 port and it should open up in a new browser tab.
NOTE : If you notice error in loading assets, create .env file under app folder and add PUBLIC_URL variable (ex: PUBLIC_URL="https://3000-nkdram-xmcloudintroduct-5irv9vlq2xc.ws-eu60.gitpod.io") to point with browser url. This will internally set public url within Next JS app and resolve issue in loading assets.
It’s so simple isn’t it ? 😀 Now one more step to make it run automatically when workspace is opened.
4. Automatically run SUGCON apps when Workspace is opened.
Gitpod has a wonderful feature to configure all the steps that is needed to run the app in a config so that each time workspace is newly created & opened, it automatically runs tasks to start the app. A .gitpod.yml needs to be created in root directory. You can also use ‘gp init’ command to create it.
tasks:
  - name: echo 'init sugcon anz' # SUGCON anz terminal tasks
    before: |
     cd src/Project/Sugcon/SugconAnzSxa
    init: |
     npm install
    command: |
	 # Command : Get Git pod url used for port 3000
     SugconAnzSxaURL=$(gp url 3000)
	 # Command : Assign it to PUBLIC_URL in .env file
     sed -i '/^PUBLIC_URL=/s/=.*/="SugconAnzSxaURL"/' .env
     sed -i "s@SugconAnzSxaURL@${SugconAnzSxaURL}@g" .env
	 # Command : Emit SugconAnzSxa steps are completed
     gp sync-done sugcon-anz
	 # Command : Start the SugconAnzSxa app
     npm run start:connected
  - name: echo 'init sugcon eu' # SUGCON EU terminal tasks
    before: |
     cd src/Project/Sugcon/SugconEuSxa
    init: |
	 # init : Listen to SugconAnzSxa completion message
     gp sync-await sugcon-anz
     npm install # init : Install packages
    command: |
     SugconEuSxaURL=$(gp url 3001)
     sed -i '/^PUBLIC_URL=/s/=.*/="SugconEuSxaURL"/' .env
     sed -i "s@SugconEuSxaURL@${SugconEuSxaURL}@g" .env
     npm run start:connected
# List the ports to expose. Learn more https://www.gitpod.io/docs/config-ports/
ports:
  - name: Sugcon Anz
    description: Sugcon Anz site
    port: 3000
    onOpen: open-browser
  - name: Sugcon EU
    description: Sugcon EU site
    port: 3001
    onOpen: open-browser
So this is how the yml looks like. It simply does all manual steps that is needed to run the app. You will notice the command set containing before / init / command which are tasks pipeline defined by Git pod. Also you’ll notice that we expose ports 3000 & 3001 as we are running both the apps together !
Another wonderful feature 'awaiters' in gitpod, as we are running the commands in two different terminals - we need them to run one after another so that port order is correct all the time. So we use "gp sync-done sugcon-anz" to emit message before starting sugcon anz app so that sugcon eu app setup can start.
You’ll notice that two terminal window open up and each terminal will run it’s own set of scripts.
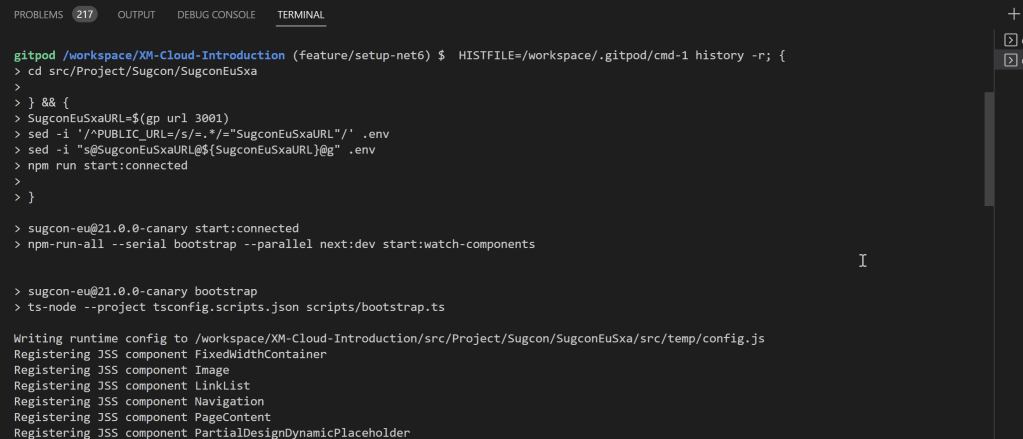
Once the scripts completes, you’ll notice that the apps will automatically open up in browser tabs.


I hope you’re awestruck just like me ! There is no more necessity to even clone the repository – we are definitely entering in a new world of developing Sitecore applications.
References :

https://github.com/Sitecore/XM-Cloud-Introduction
https://www.gitpod.io/docs/config-start-tasks
https://www.gitpod.io/docs/environment-variables
