By hosting Sitecore on Azure PaaS, you will have complete advantage over infrastructure complexities, reduced costs, high scalability and deployments are lot more easier compared to other types of hosting ( Infrastructure as a Service (IaaS), On Premise Hosting ). Still many Sitecore customers stay away from moving to Azure PaaS assuming that Intranet Site has to be configured through Azure Service Environment (ASE) and high cost involved with dedicated Azure App Services within ASE.
In this blog, we can discuss a low cost hosting solution which avoids high costs involving Azure Service Environment.
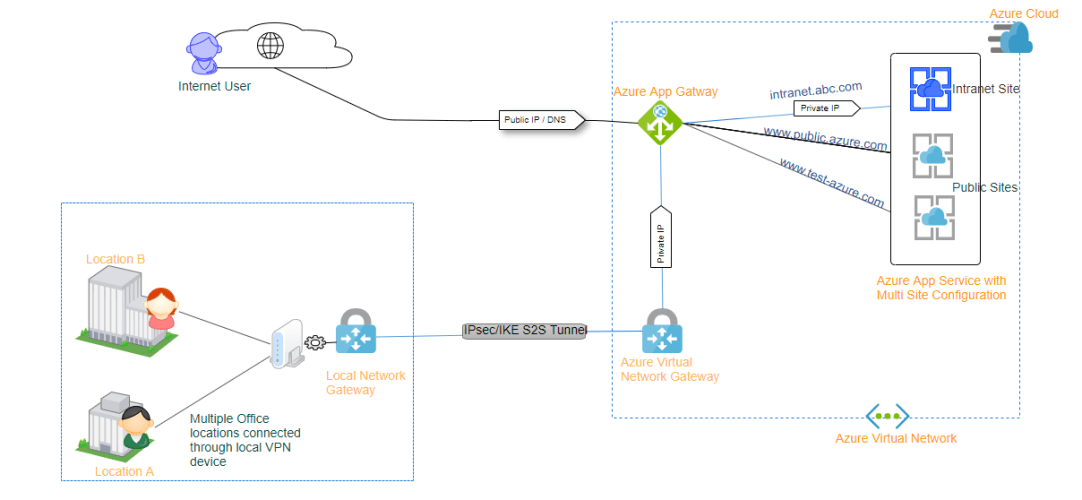
The solution is to connect Azure’s Virtual network to your local On-premise Network and then use Azure’s Application Gateway to listen to incoming requests.

Above image provides a high level idea on how it is implemented. You can notice that we receive requests from Internal users ( On-premise Users) and Internet users. As the On premise is connected to Azure via tunnel, On-prem users can access the Inranet site through Private IP whereas the Internet users can only access the sites that connected to Public IP – A simple but effective solution.
You can also use the below approach to restrict your UAT or CMS instance within your office locations.
Let’s see in detail on how it is implemented:
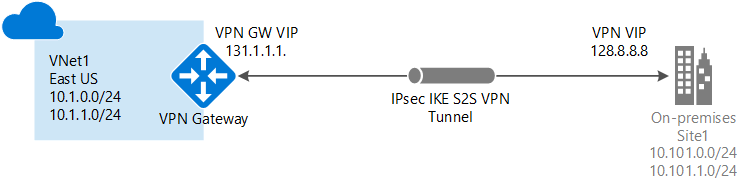
Creating Site to Site VPN between Azure and On-Prem Network
The first step is to create a VPN tunnel between Azure cloud environment and your on-premise Network. To achieve this critical piece, you need first consult with your internal IS/IT.
As mentioned by Microsoft Azure in their documentation, make sure you have below list of items before you start the process.
- Check if your VPN device is compatible with Azure. It should be configurable from your side
- You VPN Device could connect with Azure Virtual network only through a public IPV4 address. So please make sure your VPN device has one public IP through which it can connect Azure.
- You should consult with your IS/IT team to prepare a set of Subnets/IP ranges used within your On-Premise network. When you create a Virtual network in Azure, please make sure your Virtual network’s subnet doesn’t overlap with your on-premise subnets. Also, you should make sure to include all the On-premise Subnets ranges in address configuration when you create the Azure Local Network Gateways.
To achieve this step – please go through this detailed documentation provided by Microsoft Azure. They have clearly mentioned the step-by-step process to achieve this.
Once the connection is successfully established , you should see that the status says ‘Connected’ and you will notice an increase in Data in/Out. Please refer below images.


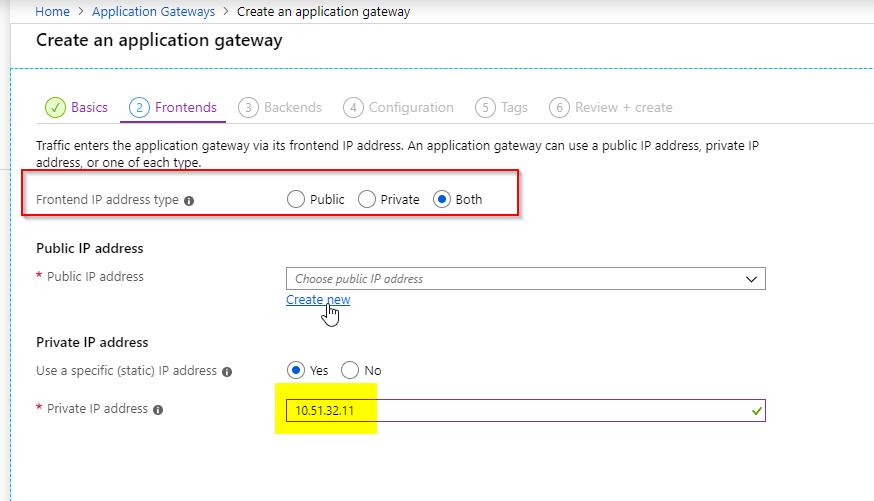
Creating Application Gateway with both Private and Public IP listeners
Now let’s create Azure Application Gateway which would act as a listener for both your public and private sites. If your new to Azure and need some understanding about how Azure Gateway works, please go through this documentation from Microsoft Azure.
- Go-to create option in Azure’s Application gateway and provide below details.

Choose Regions, Tier and then select a Virtual Network that you created previously which is used to setup the Site-to-Site VPN.
- Make sure to select proper tiers, in-order to have both Private and Public Ips in Application gateway – you need to select Standard V2.
- It’s time to add rules under configurations.
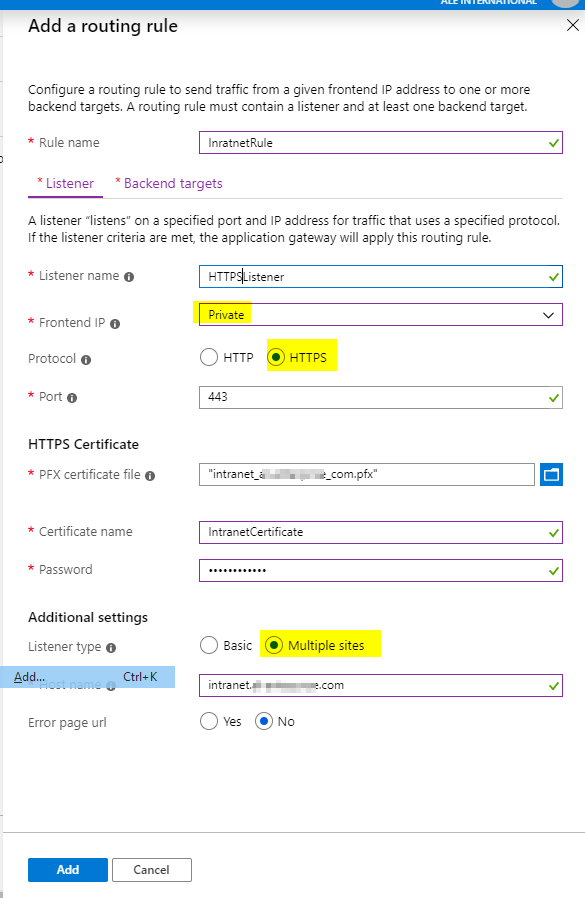
Add a rule for HTTPS , make sure to choose Private IP and Make Listener Type as Multiple sites. This is important if you’ve multisite configuration in Sitecore. We can later on implement a Listener Rule for HTTP and redirect all the HTTP requests to HTTPS.
The HTTPS setting should look like below. It is very important to set “Override with new host name” and then choose “Override with specific domain name”. If this is not chosen, the hostname header will be set with Azure’s App Service’s Public Url [ https://Xxx-azure-pro-438890-cd.azurewebsites.net ]. Sitecore Multisites are resolved through Hostname, as the Hostname doesn’t point to your intranet site – Sitecore cannot resolve to your intranet Site. So it is important to override with Specific Domain name.

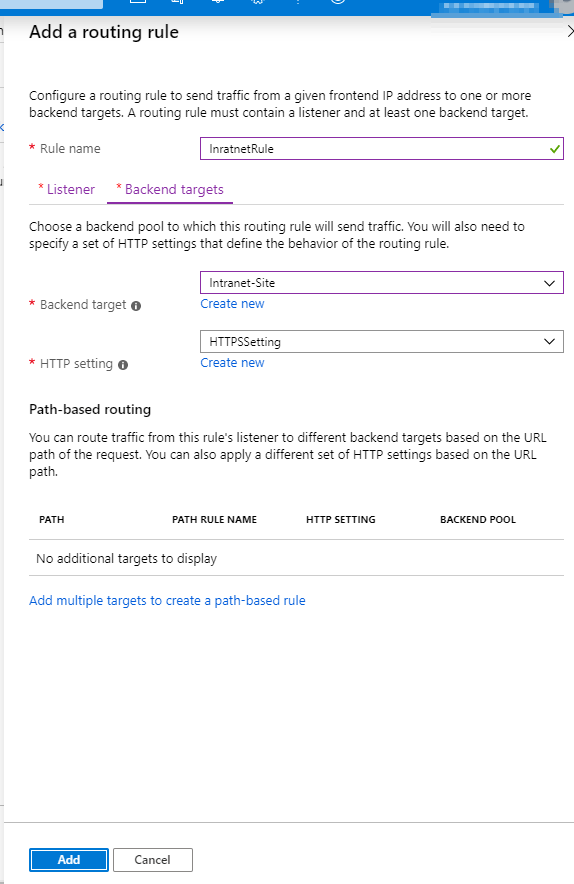
After creating the settings, Backend Targets will look like this.
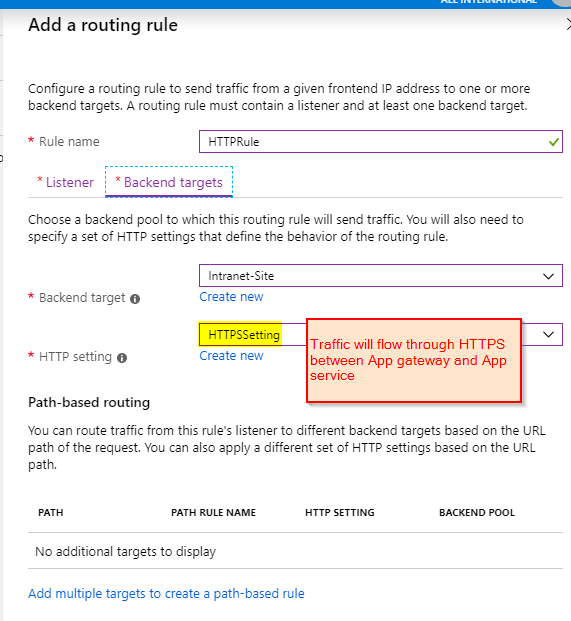
Now add a HTTPRule by clicking on Add Rule button in Configurations screen.

The HTTPRule settings should look like below images.

Hola ! After adding all these settings – you can now click on create button.

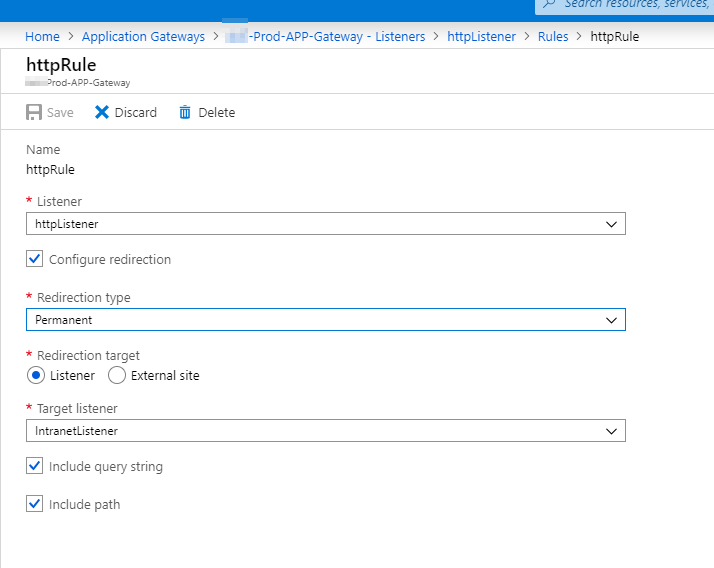
- Create Redirection from HTTP listener to HTTPS
Goto HttpRule and click on Edit and then create a Redirection to IntranetListener ( HTTPSListener ). This way all the requests that are coming in from HTTP will now be redirected to HTTPS Listener.
Now that you’ve finished all the necessary configurations required for your Intranet site, you can now add the intranet IP address that is mapped to Application gateway as an A-Record in your DNS Server.
You can now repeat same process for your public sites. But make sure you create Listener by clicking on Multi-Site option.

In-Case if you wish to secure your application gateway with Firewall rules, you can use Application Gateway with WAF. Please go through this documentation to understand web application firewall.
I hope this article helps to move your Sitecore instance in Azure. In-case if you have any another solutions, please share them in comments below.
